I started and (almost) finished this project 3 weeks ago, but I forgot to buy Command Strips when I purchased the rest of my supplies, so I couldn't hang and photograph it until the strips were obtained.
Now, that I have got the strips and hung the boards, lets get started on this tutorial!
Lets begin with all the supplies you will need:
(Don't forget the command strips!)
I got the fabric squares from WalMart for $1 each! It was such a good deal and they had a great selection. The squares are very convenient, but you can use whatever fabric you like!
I found a complementing ribbon at Michael's.
Before I got started, I unfolded and ironed the fabric squares to get all the creases out.
I then convinced my brother to take action shots for me while I cut the fabric to size.
The cork tiles were 12"x12", and I just laid the tile on the fabric and cut around, making sure to leave about 2 inches on each side to wrap around the tile later (I wasn't too exact).
Then I began pulling the fabric around the edges and stapling it into place. I found that putting a magazine under the tile while you stapled helped, but you still had to put a lot of force behind the stapler.
I did this on all 4 sides, skipping the corners.
Staple all the way up to the corners, but leave that little part sticking up for the next step.
I then flattened out the loop and put another staple in. This allows the fabric to cover the front side smoothly, but still allow the tile to lay flat against the wall when hung.
Now fast forward to the part where I have all four of the tiles covered in fabric and I am now at the step to add the ribbon.
I measured 6 inches on each side and made a small mark on the back with pencil.
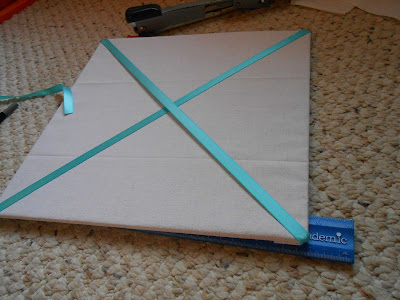
Then I stapled ribbon in an "X" from corner to corner.
I put two pieces of ribbon on the 6 inch dot I made and then wrapped them around to the other marks on every side, and I ended up with this:
My brother had deserted me at this point, so I was left to try and take pictures as well as do the craft. I am sorry they are not as detailed! I tend to get caught up in my work.
As an afterthought I added some silver push-pins that I had lying around the house where the ribbon crossed. This helps the pictures stay behind the ribbon and not slip out.
And then you are all done and ready to hang your boards! There are so many different options you could choose for these boards.
I love that with the ribbon, I have the option to put things on my boards without having to stab them with a push-pin!
This is just the first, of many posts about my bedroom make over! Be expecting more:)
Let me know if you make boards like these.
-Have a great week!


